
hans
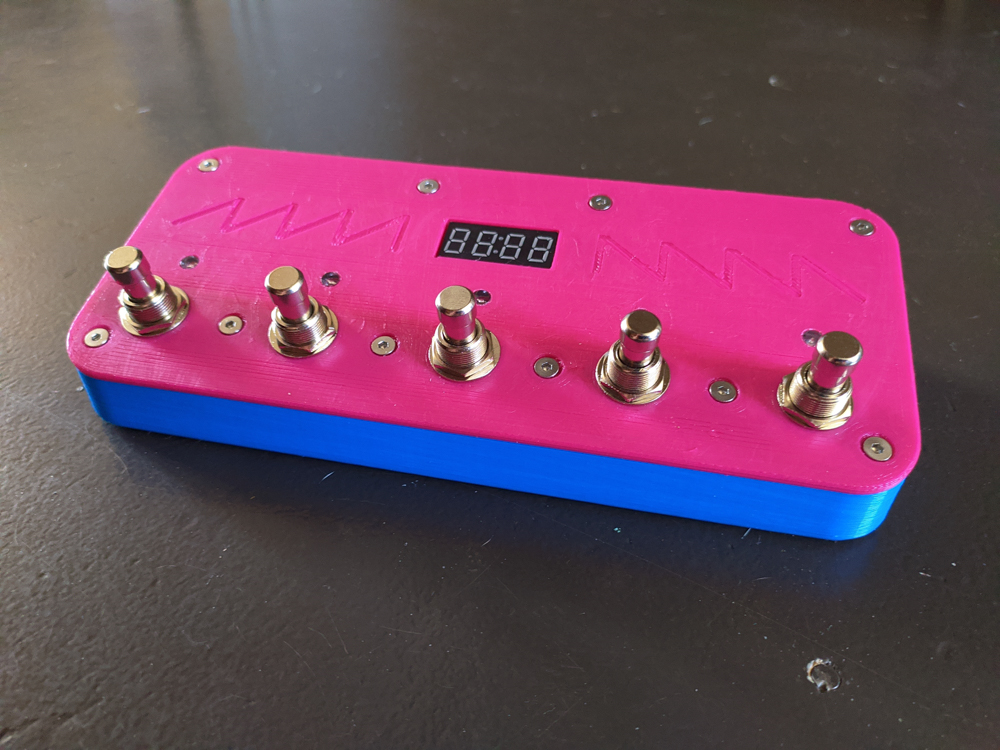
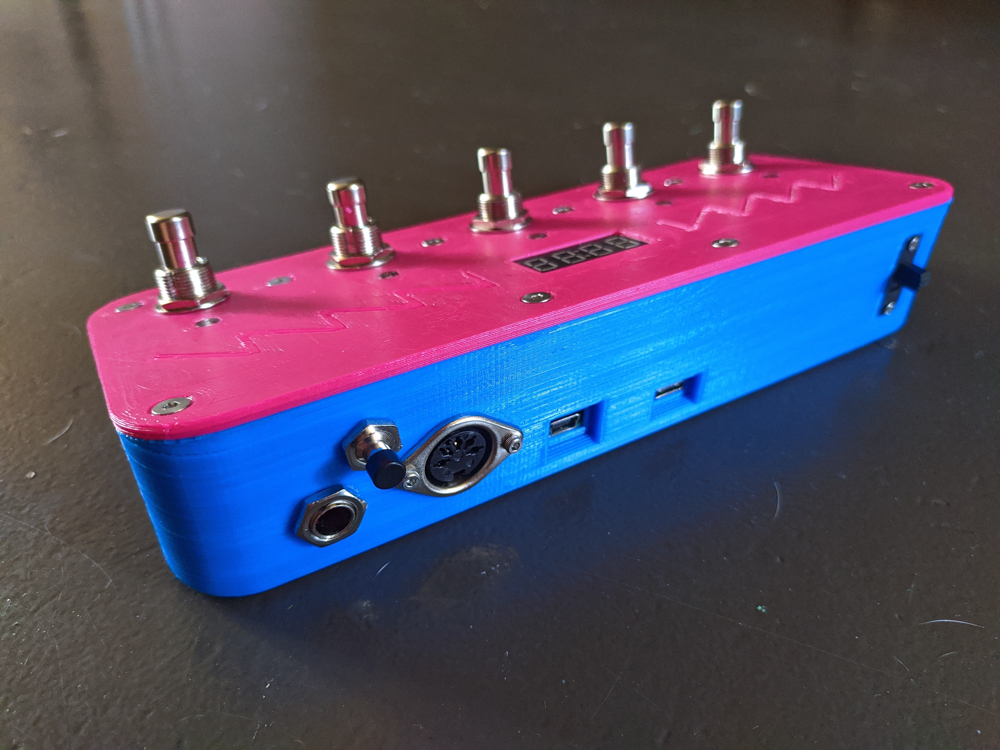
Hans is a 5 button battery powered USB/DIN MIDI footswitch.
Why did I name it Hans? No good reason at all.
Hans has the following hardware/features:
- 5 momentary foot switches with status LEDs
- Expression pedal input (works in all button modes)
- Up to 5 virtual “banks” of buttons that can be switched between (3 enabled by default but can be changed in the edit menu)
- Full editing of all footswitch functions from the switch itself - you don’t need to use your computer at all to change any settings.
- Changes can be saved to EEPROM and will be loaded automatically on startup.
- USB-C charging with an 18650 on board for portable power
- USB (mini) and 5-pin MIDI cable connections for MIDI data
- Teensy 2.0++ brains running at a blazing 16Mhz
- a 4 character screen
When Hans is turned on you can choose between four modes:
- send MIDI note on/off messages (alternative momentary mode can be activated to send note on for both press & release)
- send MIDI control change (CC) messages
- send MIDI program change (PC) messages
- an edit mode to customize all features of the footswitch
The first three modes are self-explanatory. Both the note on/off and CC modes can be toggled between momentary and toggle operations (done by holding shift + pressing button 2), and each note can be switched between two momentary modes; one sends note on/note off on press/release and the other sends note on messages on both press and reelease.
The edit mode allows changing most of the settings on the device. You can change the midi notes sent (and the velocity sent with them), the control change numbers and values, and program change numbers. You can also edit the default mode (in case you want to start in CC or PC mode), the timeout before the default mode is selected, and various other settings like screen and LED brightness.
How to use Hans:
- Turn Hans on.
- You will be presented with a mode selection screen. Press a button to choose a mode.
If no mode choice is made the default will be chosen after a timeout (5 seconds).- Button 1 - Note On/Off
- Button 2 - Control Change
- Button 3 - Program Change
- Button 5 - Edit Mode
- If you selected modes 1 through 3:
- Press the footswitch buttons to send the note/CC/PC message associated with that button.
- Hold the shift button and press one of the front switches for additional functions:
- Button 1/5 - Change button bank (-/+)
- Button 2 - Switch between momentary/toggle modes
- Button 3 - Return to mode select menu
- Button 4 - Panic! Stop all playing notes
- If you selected edit mode:
- Navigate through menus/submenus using the following buttons:
- Button 1 - Go back to previous menu
- Button 2 - Previous item (in menu) OR Reduce value by 1 (when editing)
- Button 3 - Select item (in menu) or accept value (when editing)
- Button 4 - Next item (in menu) or Increase value by 1 (when editing)
- Changes will not be saved to EEPROM (to be loaded on next startup) unless you select SAVE from the either the main menu or under the DATA submenu. If you make a change you do not like you can either restart the unit, load the settings from EEPROM (under DATA submenu), or load the factory defaults (also under DATA submenu).
- Navigate through menus/submenus using the following buttons:
Updating Hans:
Hans can be easily updated from a computer running Windows 7/8/10.
- Download the Teensy Loader app from here
- Download the latest release HEX file
- Run the Teensy Loader and connect your Hans to your computer using a mini-USB cable
- Open the hex file you downloaded in Teensy Loader and enable automatic mode in the loader
- Press the programming button on your Hans (the one embedded in the right side) and the firmware will upload
- Disconnect Hans when complete - you are ready!
Replacing/Installing Battery:
You can install/remove/replace the battery in your Hans by following these steps:
- Ensure the power to Hans is turned off, no cables are connected, etc.
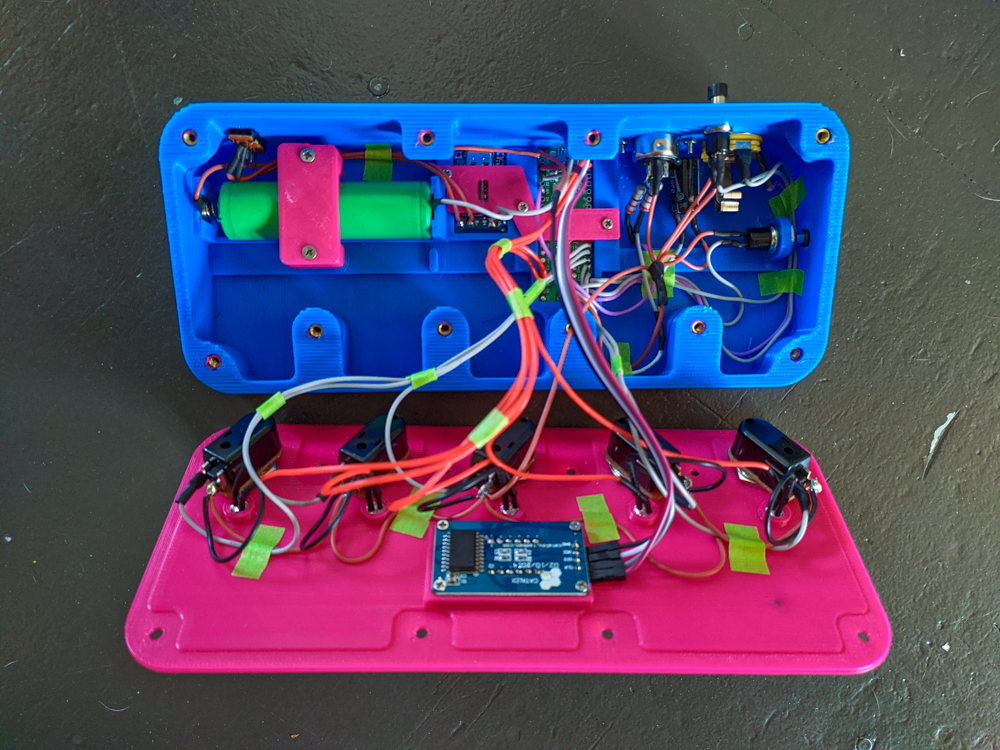
- Remove the ten hex screws on the face and set aside.
- Carefully lift the back of the face of footswitch and flip it forward, making sure not to snag any wiring.
- Remove the two phillips screws holding the battery clamp down.
- Insert/remove/replace the battery as needed.
- Reinstall the battery clamp with the two screws.
- Carefully flip the face of the footswitch back onto the base, making sure not to snag any wiring.
- Install the ten hex screws on the face in whatever order pleases you. I like to install from the centre outwards.
You may need a bit of gentle pressure when reinstalling the face to push any wiring down - however it should not be snagged anywhere and you should not have to force the face down onto the base. There should be enough room in the inner cavity to neatly fold any wiring into a place that does not cause any stress to the wiring or internal components.
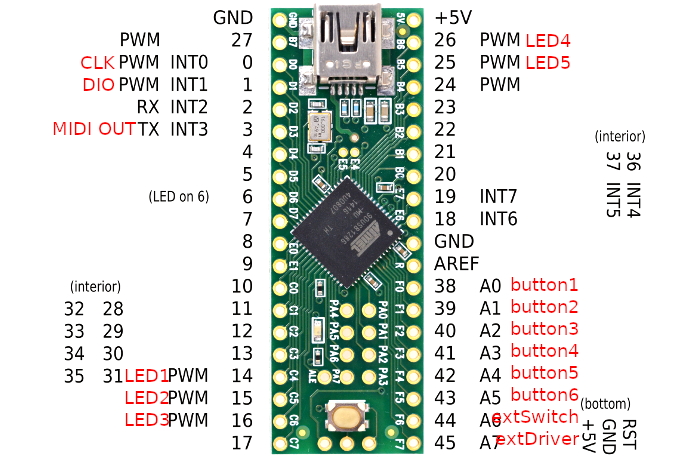
Pinout:
KiCad Schematic:
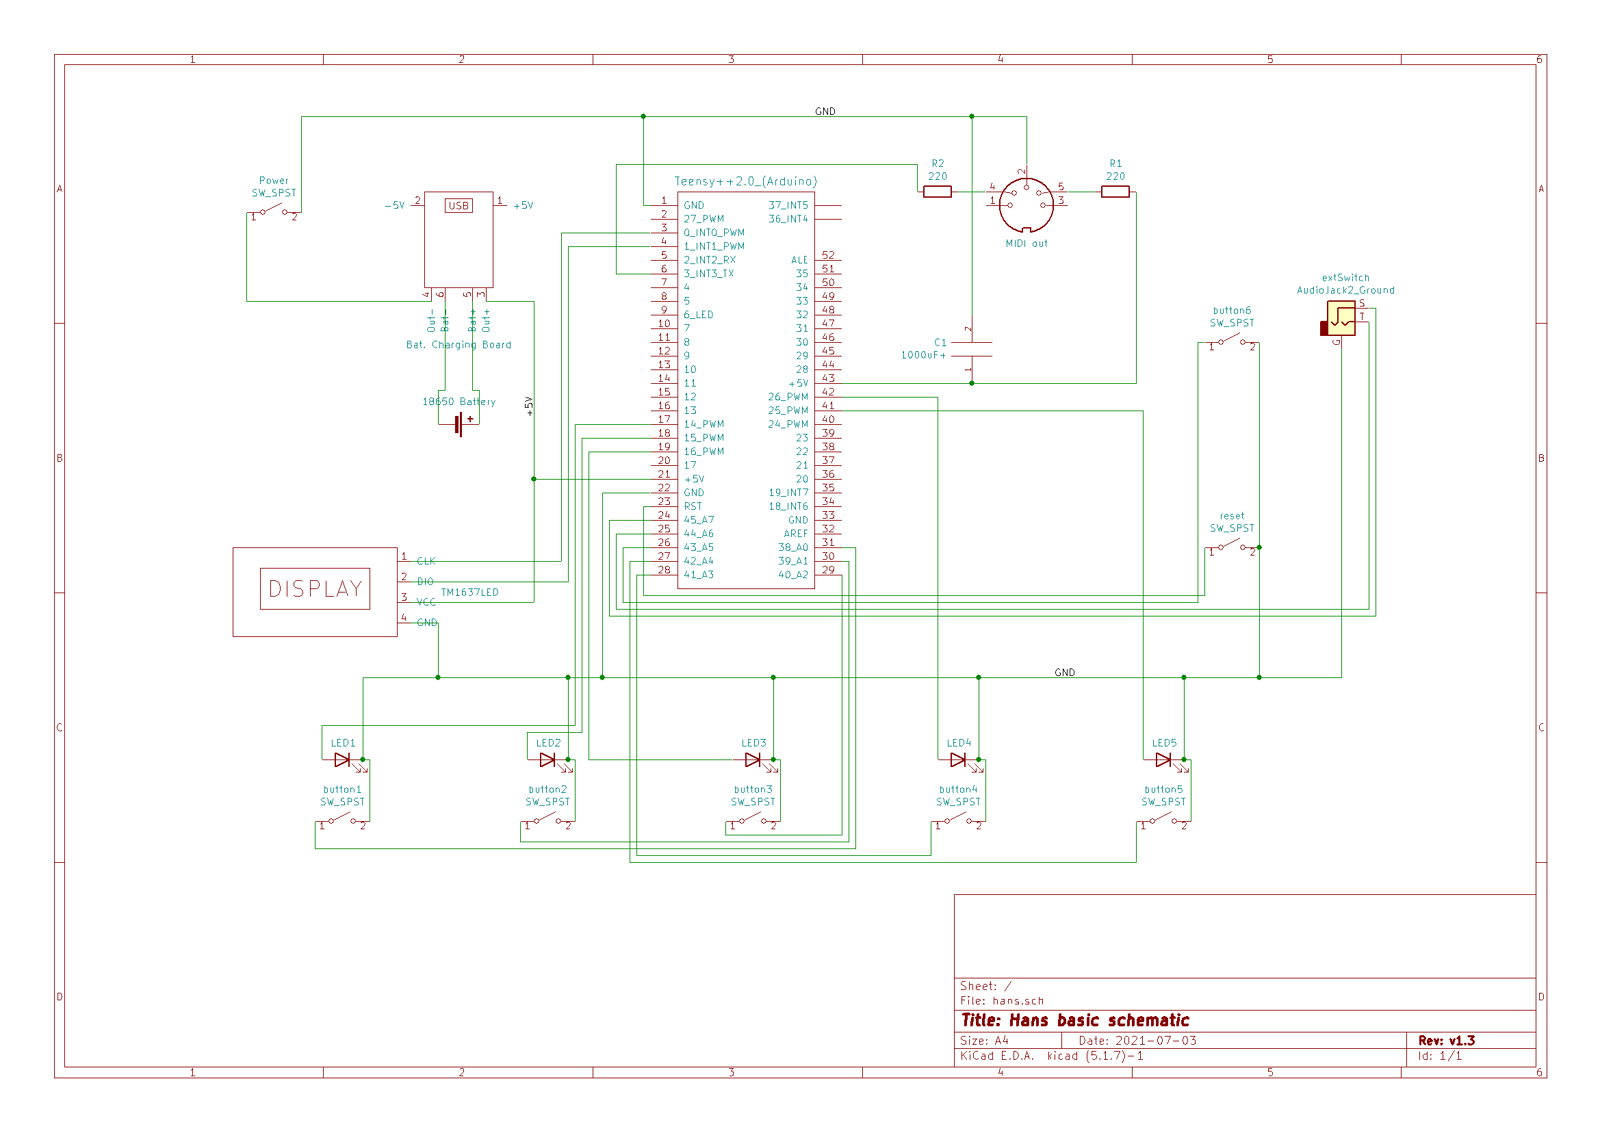
Parts list:
- Toggle Switch 2 Position 6 Pins x 1
- SPST Momentary Soft Touch Push Button Stomp Foot Pedal Switch x 5
- 6.35mm Mono Female Jack With Switch Socket Panel Adapter x 1
- 5 Pin Panel Mount Female Jack DIN Adapter MIDI Connector x 1
- 7mm Momentary Push button Switch x 2
- TM1637 4 Bits Digital LED Display Module x 1
- Flat Top 5V 5mm Red LED Lamp w/integrated resistor x 5
- Type-C 5V 1A 18650 Lithium Battery Charger Module x 1
- Battery Spring and Plate Set x 1
- Teensy 2.0++ USB AVR Development Board or clone x 1
- 1000uF+ 6.3V+ Capacitor x 1
- 220 Ohm Resistor 1/4W x 2
- M3 Thread Knurled Brass Threaded Heat Set x 10
- M3x10 Stainless Countersunk Hex Head Bolt x 10
- M2x6mm Stainless Countersunk Self-Tapping Screw x 6
- M2x10mm Stainless Hex Head Bolt x 2
- M2 Stainless Nut x 2
Source code: hans.ino
STLs: hans-stl.zip
GitHub Repository | Youtube | Thingiverse
Dan